- 623 Grable St. Rockford, IL 61109
- jason@a1lapping.com
- 815-398-1465
A-1 Lapping offers a number of lapping and fine grinding services. Click any of the links below to learn more about that service and the technology we utilize.
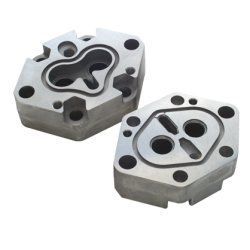
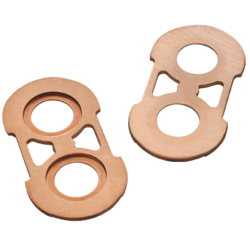
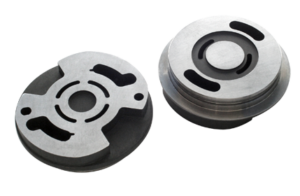
A-1 has become the industry leader in fine grinding due to our unrivaled experience with the process and our vast array of machines and grinding wheels. We currently operate 6 fine grinders, the largest of which is the only one in the world. These machines give us the flexibility to process virtually any material in part sizes ranging from 1/8” diameter all the way up to 16” diameter with every conceivable size/shape in between.
Fine grinding is similar to double sided lapping in its general operation but does provide some distinct advantages. While lapping uses a loose abrasive slurry type media to perform the cutting action, fine grinding uses fixed abrasive wheels most often comprised of different combinations and concentrations of CBN or Diamond. There are many different abrasive sizes, layouts, and combinations that can provide a wide variety of cut rates, surface finishes, and overall part quality.
The two main advantages of fine grinding over conventional lapping are speed and cleanliness. The speed and pressure that the fine grinders can provide in many cases eliminates the need for any sort of rough grinding operation prior to finishing the work piece. This results in direct cost savings to our customers. In many cases fine grinding can remove material 50 to 100 times faster than conventional lapping while still maintaining lapping type tolerances.
Cleanliness is the other main advantage. While a lapped part usually ends up with a dull gray mat finish, parts that are fine ground have a brighter, more reflective surface finish and similar if not better surface finish values. Oftentimes fine ground parts are able to be packaged immediately after completion with no additional wash steps. This is achievable because of the Transor Filtration units that we run on all of our machines. The Transor technology offers true 1 micron filtration for our grinding oil, which results in very clean parts as they come out of the machine.
Lapping is a unique process that removes material by the action of abrasive media suspended in oil or water based lubricant that is interposed between a rotating wheel and the workpiece. As the wheel rotates it carries the loose abrasive across the face of the workpiece, removing stock at a controlled rate. Media, lap size, machine speed, and down pressure determine the efficiency and the quality of the finished part. Lapping offers extreme accuracy and is a cost competitive process in either high or low volume work piece requirements. Wherever size, flatness, parallelism, or surface finish is a problem lapping has been found to be a great solution.
One of the distinct advantages of the lapping process is its flexibility. Virtually any material can be lapped with varying degrees of accuracy and surface finish refinement. Material that we have experience lapping include powdered metal, steel, brass, bronze, aluminum, carbide, ceramic, cast iron, titanium, bi-metal, carbon fiber, and various types of plastic.
A-1 currently operates over 30 lapping machines setup with several different types of abrasives and lubricants. These machines range in size from a 12” lapping table up to 72” lapping tables. Having such a wide range of equipment allows us to process a variety of different materials, and part shapes/sizes.
Our journeymen operators’ experience in many lapping techniques and processes ensure our ability to provide quality that is second to none. Unlike many modern machining practices that are fully or partially automated, lapping requires an incredible amount of operator experience and expertise to be successful. Our extensive experience and constant experimentation with the lapping process gives us a distinct advantage over our competitors. We would encourage you to reach out to us with any questions that you may have about our capabilities.
Contact us today to see how we can help your business.
Approximately 10 years ago A-1 was approached by a customer that was looking for lapping or fine grinding of a very high volume, tight tolerance shim project for the next generation of 8, 9, and 10 speed automatic transmissions. After much discussion on the topic it was determined that while either lapping or fine grinding could easily hold the tolerances that were required, due to the extremely high volume of parts involved the throughput with either of those processes would not be sufficient to meet the demand. After months of research A-1 settled on partnering with J.L Lucas to build the first ever Lucas Daisho vertical spindle double disc grinder specifically for this shim application. The rest as they say is history.
Since that time A-1 has purchased 4 identical machines and has processed well over 60 million shims/washers for transmission, differential, and other automotive applications. With these machines we are able to quickly and efficiently double disc grind shims as thin as .028” and with tolerances as tight as +/-.0002” We utilize both conventional and super abrasive wheels on these machines depending on the tolerances required. We would welcome the opportunity to quote and/or run samples for any present or future shim projects that you may have.
A-1 is excited to announce the arrival of our Abtex brush deburring machine. This machine gives A-1 the flexibility to brush deburr parts in line with our Stahli 1405 Fine Grinder and was specifically designed with oversized motors and oversized brushes to handle the most rigorous brush deburring applications.
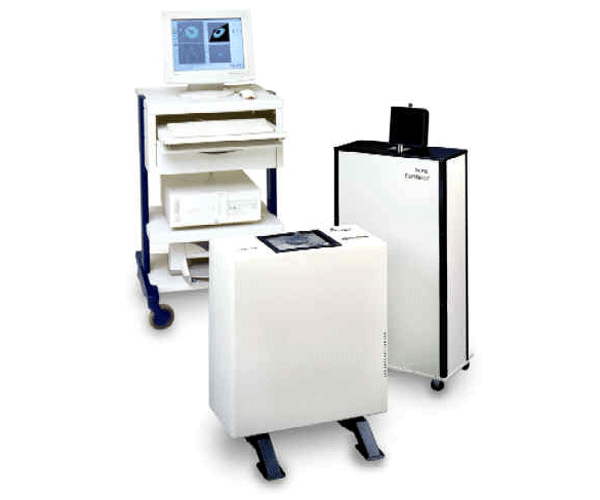
Do you have parts that you need certified for flatness? Does your customer require that these certifications are done by an outside source? Are your current flatness inspection methods just not good enough? Does your company not have the volume to justify the purchase of a $200,000+ piece of inspection equipment that does nothing but inspect and certify flatness?
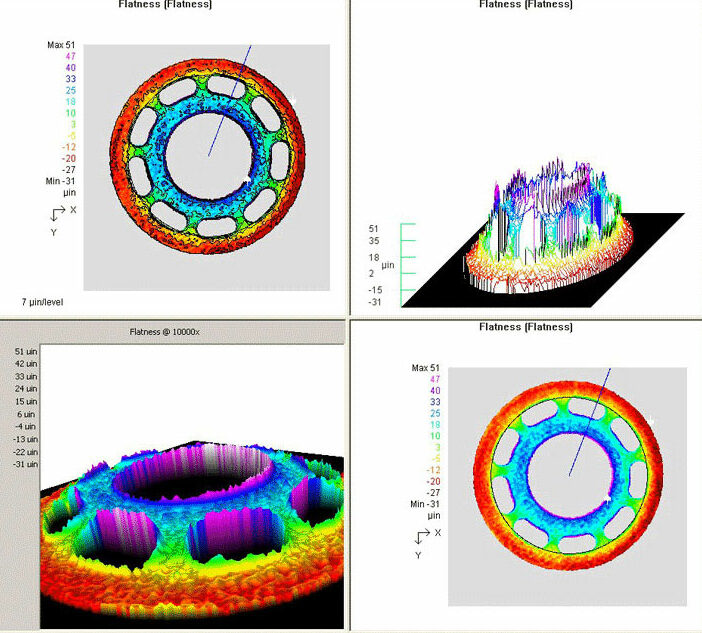
If you have answered yes to any of these questions, A-1 Lapping has the solution for you. Here at A-1 we offer contract flatness inspection on our Tropel Flatmaster 200mm laser interferometer. This machine gives us the ability to accurately inspect and document flatness on parts as small as ¼” OD up to 8” OD.
With this technology we can provide many types of graphs, layouts, and 3D topographical images of your workpiece depending on your requirements. If you have any parts that require certified flatness inspection we welcome the opportunity to quote contract flatness inspection to you.
We would welcome the opportunity to quote any new projects or process samples of existing projects that you may have. Fill out the form to get in touch and see how you can put your problems in our laps!